How to Ship a Bike Safely

Shipping a bike can be a daunting task, especially if you’re doing it for the first time. Whether you’re selling a bike, sending it as a gift, or preparing for a cycling trip in another location, ensuring that your bike arrives safely is paramount. Here we will discuss how to ship a bike safely, covering everything from preparation to choosing the right shipping service.
1. Preparation
Disassembling Your Bike
- Remove Pedals: Use a pedal wrench to unscrew the pedals. Remember that the left pedal has a reverse thread.
- Handlebars: Loosen the stem and turn the handlebars parallel to the frame. Secure them with zip ties or padding.
- Remove or Lower the Saddle: Use an Allen key to remove or lower the saddle and post. Wrap them in bubble wrap for protection.
- Wheels: Depending on the size of your box, you may need to remove the front wheel. Secure the rear wheel to the frame.
Protecting the Components
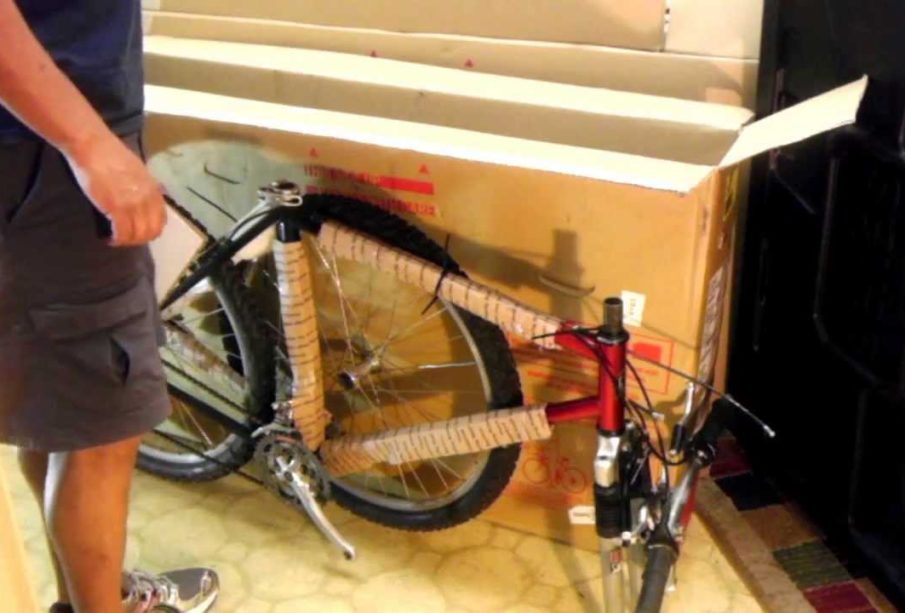
- Frame: Use foam padding or bubble wrap to protect the frame, especially around the chainstays, fork, and dropouts.
- Derailleur: Protect the rear derailleur with bubble wrap or a special derailleur guard.
- Brake Rotors: If your bike has disc brakes, consider removing the rotors to prevent bending.
2. Choosing a Bike Box or Case
Cardboard Box
- Pros: Inexpensive and readily available at bike shops.
- Cons: Less durable and offers minimal protection against heavy impacts.
Hardshell Bike Case
- Pros: Offers the best protection, ideal for frequent travelers or expensive bikes.
- Cons: More expensive and heavier, which might increase shipping costs.
Soft Bike Bag
- Pros: Lighter than hard cases and offers decent protection.
- Cons: Not as protective as hard cases against severe impacts.
3. Packing the Bike
- Positioning: Place the frame in the box first, followed by the wheels. Ensure that there’s no metal-to-metal contact.
- Securing Components: Use zip ties or Velcro straps to secure loose parts to the frame.
- Padding: Fill empty spaces with bubble wrap, foam, or packing paper to prevent movement during transit.
- Tools and Accessories: If sending tools or accessories, wrap them separately and secure them in the box.
4. Sealing and Labeling the Box
- Tape: Use strong packing tape to seal the box securely.
- Labeling: Clearly label the box with the shipping and return addresses. Mark the box as ‘Fragile’ and ‘This Side Up’ to encourage careful handling.
5. Choosing a Shipping Service
- Research Carriers: Compare prices and services from carriers like UPS, FedEx, or specialized bike shipping services like Shiply. Shiply offers competitive pricing and a range of options tailored to bike shipping, making it a convenient choice for many cyclists.
- Insurance: Consider purchasing additional insurance, especially for expensive bikes.
- Tracking: Choose a service that offers tracking for peace of mind.
6. Shipping and Tracking
- Drop Off or Pick Up: Decide whether to drop off the bike at a shipping center or schedule a pick-up.
- Tracking: Use the tracking number to monitor your bike’s journey.
7. Receiving the Bike
- Inspection: Upon arrival, inspect the bike for any damage before assembling it.
- Assembly: Carefully reassemble the bike, checking that all components are secure and functioning correctly.
Conclusion:
Shipping a bike safely requires careful preparation, the right materials, and a reliable shipping service. By following these steps, you can ensure that your bike arrives at its destination in the same condition it left, ready for your next cycling adventure or for its new owner to enjoy. Remember, the key to successful bike shipping is in the details – from the way you disassemble and pack each component, to the choice of shipping carrier and service.


